 First, let me start out by saying, this is going to be a LONG post.
For my youngest daughter's birthday, she requested a Barbie cake. We saw one at a local bakery, and she just HAD to have one. I told her that I would do my best, and I would try to make it look like the one in the store. It couldn't be that hard....right?
I started my search for the perfect cake recipe. I only use box cakes, by the way. They are easier, and they taste better too. At least we think so!
I have a Pampered Chef batter bowl, that I bought years ago. The consultant had said that with it, you could make a Barbie or princess cake, among other things.
So, I am going to tell you, and show you, just how I made my daughter's dreams for a Barbie cake come true.
First, I used three cake mixes. One for the batter bowl, and two for the round cake pans. Make your cakes as directed on the box. If you choose a lighter color cake, it will be easier to frost.
I found this video that was very helpful.
I did not follow this to a "T", but looking back, I wish I had! She really gave a lot of great tips, that would have made it easier to make, and assemble. But, as usual, I was in a hurry.
My batter bowl is bigger than the bowl she used to create the "dome" shape. You can probably use whatever you have, as long as you think it will work, and it is safe to put in the oven.
Make sure you grease your pans thoroughly with Crisco and flour. Unless, you discover that the Crisco has gone bad. How do you know this? It smells horrible, and it is a strange color. Not green (I have a friend who had hers turn green) but it was just clearer, and greasier than I remember it being. But, the smell? YUCK!
If that happens, use plan "B" and spray the pans with non-stick spray. Not so much that you almost pass out in a coughing fit from all the fumes. Not that I would know anything about that. *Cough*
If you do have the PC batter bowl, you have to bake it at 325 for 1 hr. 10 mins. to 1 hr. 15 mins. or until you test it, and it doesn't leave "goop" on your cake tester (or knife, if you just can't find that cake tester....again.)
The thing is, it takes a LONG time to cook. I can't tell you the exact time, because every time I checked it, it was goopy. So, I just set the timer again. And again. And again. By the time it was completely cooked, the cake itself was rather....hard. This part is not moist and fluffy, but you need the "dome" to make the skirt. I have been told it still tastes good though.
Bake your two round cake pans the normal temperature and the normal amount of time. Or, if you are like me, and want to kill two birds with one stone (ACK! I can't say that! I have a pet bird!) just plop them in the oven with the batter bowl. That will work too, just cook them for the regular amount of time, as directed on the cake box.

Here they are, out of the oven. There is only one round cake pan shown, but I did cook two.
Let them cool for several hours. Or, if you are in a rush, put them in the freezer, and pray they cool off QUICK!
Carefully remove them from the pans. Slice off the "dome" that was created by the batter bowl top. It will be rather hard and crunchy. What do you expect for something that has cooked that long? My daughter called it "The Dome Of Death". She tends to be a bit dramatic. I'm not sure where she gets that from. *Wink*
Carefully remove them from the pans. Slice off the "dome" that was created by the batter bowl top. It will be rather hard and crunchy. What do you expect for something that has cooked that long? My daughter called it "The Dome Of Death". She tends to be a bit dramatic. I'm not sure where she gets that from. *Wink*
 This is what it looks like when you take it out of the batter bowl.
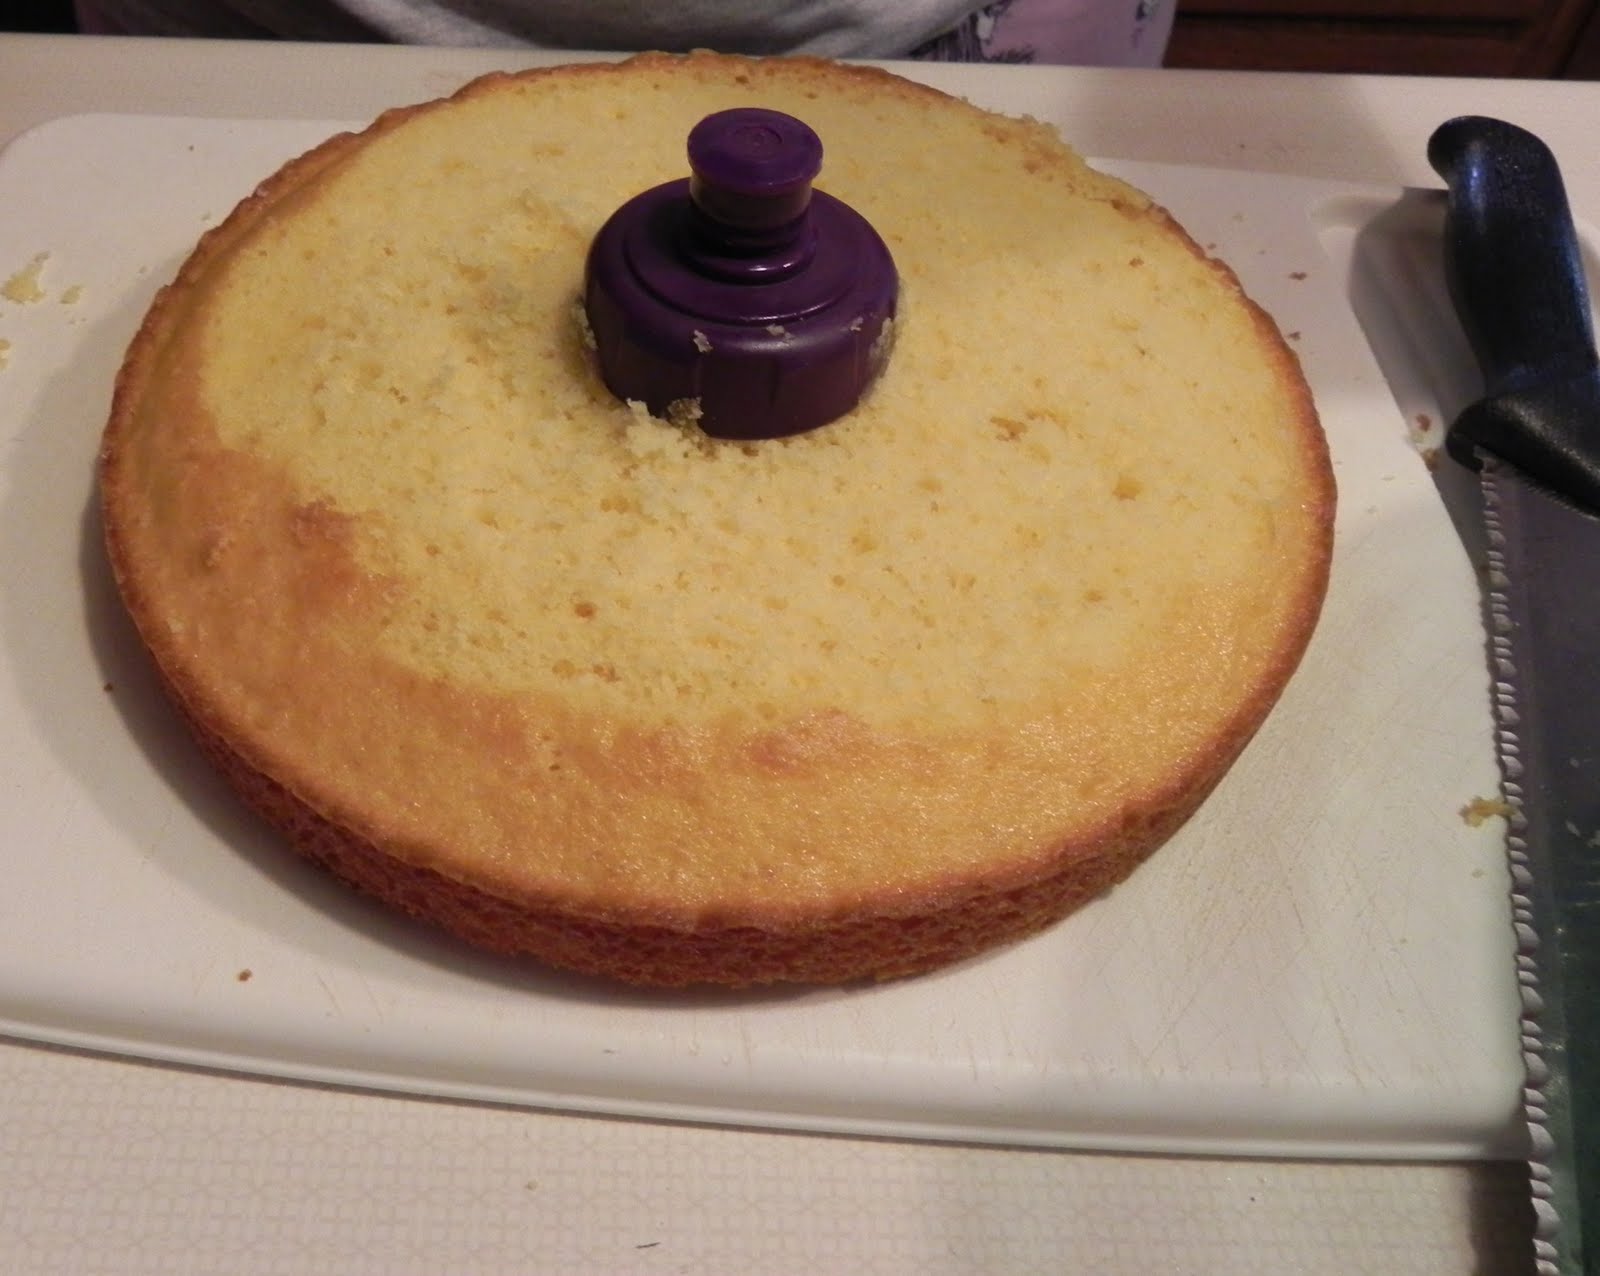
 Flip it over, and cut off the top. Make sure it is even!
 The nice lady in the video used a pastry cutter, but since I don't own anything like that, I used an old water bottle top to cut circles in the middle of the cakes. You can just call me MacGyver. http://en.wikipedia.org/wiki/MacGyver (Rest assured, I did not use any duct tape or a Swiss army knife for this recipe).


I didn't cut a hole in the "dome" cake, because the top of the cake had already split some, and I figured I could just shove the Barbie in.

Stack the second cake on top of the first one that is already iced. Frost the second cake. Again, just slap the icing on.

Now, here is where I ran into trouble. Had I been a good girl, and let my cakes cool the required amount of time (3 whole hours) I may not have had this happen. But, as I attempted to put my (heavy) "dome" cake on top, it appeared that the cake just might *gasp* CRUSH the other cakes! It was that heavy. That puppy was solid.
 I tried to make a platform to sit on top of the round cakes, so the "dome" cake could sit on top of that. Since I am not a professional cake decorator, I didn't have anything that would work, so once again, I improvised. I cut a Cocoa Pebbles cereal box (Ha!) into the shape of a circle, with another circle in the middle, and tried using plastic straws as "stilts" (again.....MacGyver), but I just couldn't make it work. About an hour later, I gave up on that, and just stuck the cakes back in the freezer again. I let them sit in there for a little while longer, and tried again. This time, it seemed to work better.
I then carefully frosted the "dome" cake. VERY carefully. More praying. If you take your knife, and make little "swirls" in the icing, it will look pretty, and you will not have to be precise. I probably used a can and a half to two cans of frosting for this part.

I then had my girls decorate her "skirt" with little candy flower sprinkles, and my oldest piped frosting around her layers.


My daughter had picked out a fairy Barbie, that had hair almost the same color as she does. Her arms would not stay down, as she is a "flying" fairy. So, the girls decided that Barbie would just be holding a sign. Works for me.
We wrapped the Barbie up in plastic wrap. We made sure to buy a Barbie with a plastic bodice that was pink, so we wouldn't have to decorate it.
I shoved the Barbie down into the hole that was made from the split (I helped the split along a little bit with a knife) and she went right down into the holes I had made through the other cakes.
 There was a bit of a gap around Barbie's waist, so we piped some frosting around it to fill it in. We also tied her hair up, so her hair wouldn't get any frosting in it.
We made a sign for the birthday girl, and taped it to Barbie's hands.
Here is the finished product, complete with the most adorable little red-head you will ever see.


Wow Amiee,that cake looks fab!Hope your daughter had a lovely birthday.
ReplyDelete~Anne.
that looks great! I hope Sierra will want a princess cake someday.
ReplyDeleteAwesome job.
ReplyDeleteThank you :) Samantha, I'm sure she will!
ReplyDeleteThat's awesome! I loved Barbies as a kid, but never managed to have a cake like that!
ReplyDeleteIts awesome. Thanks for sharing Barbie cake tips with us. http://www.monginis.net/barbie-doll-cake/
ReplyDeleteNice Article, CountryOven Provides Cartoon Cakes
ReplyDeleteMidnight flowers delivery in Hyderabad
Order Birthday Cake Online | Send Cake Online To India